Kibana Indexing
The first thing to do in Discover is to select an index pattern, which defines the data you want to explore and visualize.
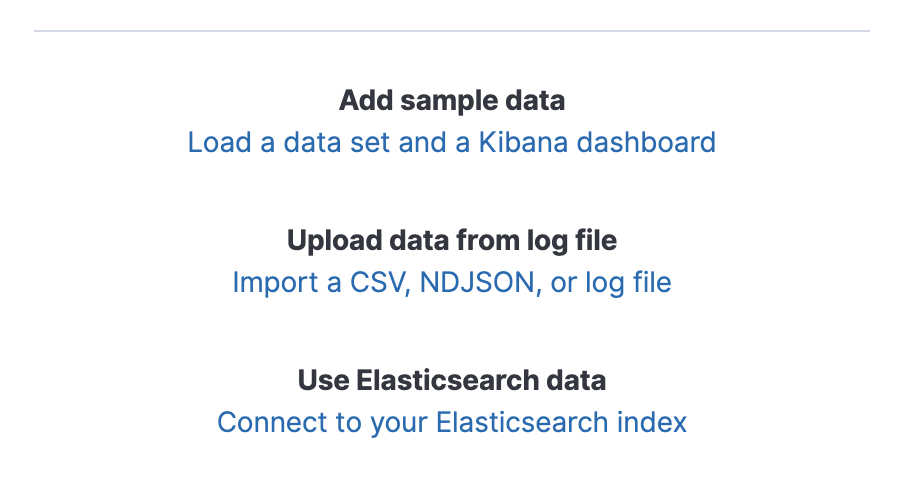
This will be the Simflofy index created during or prior to integration. To use your simflofy elasticsearch data:
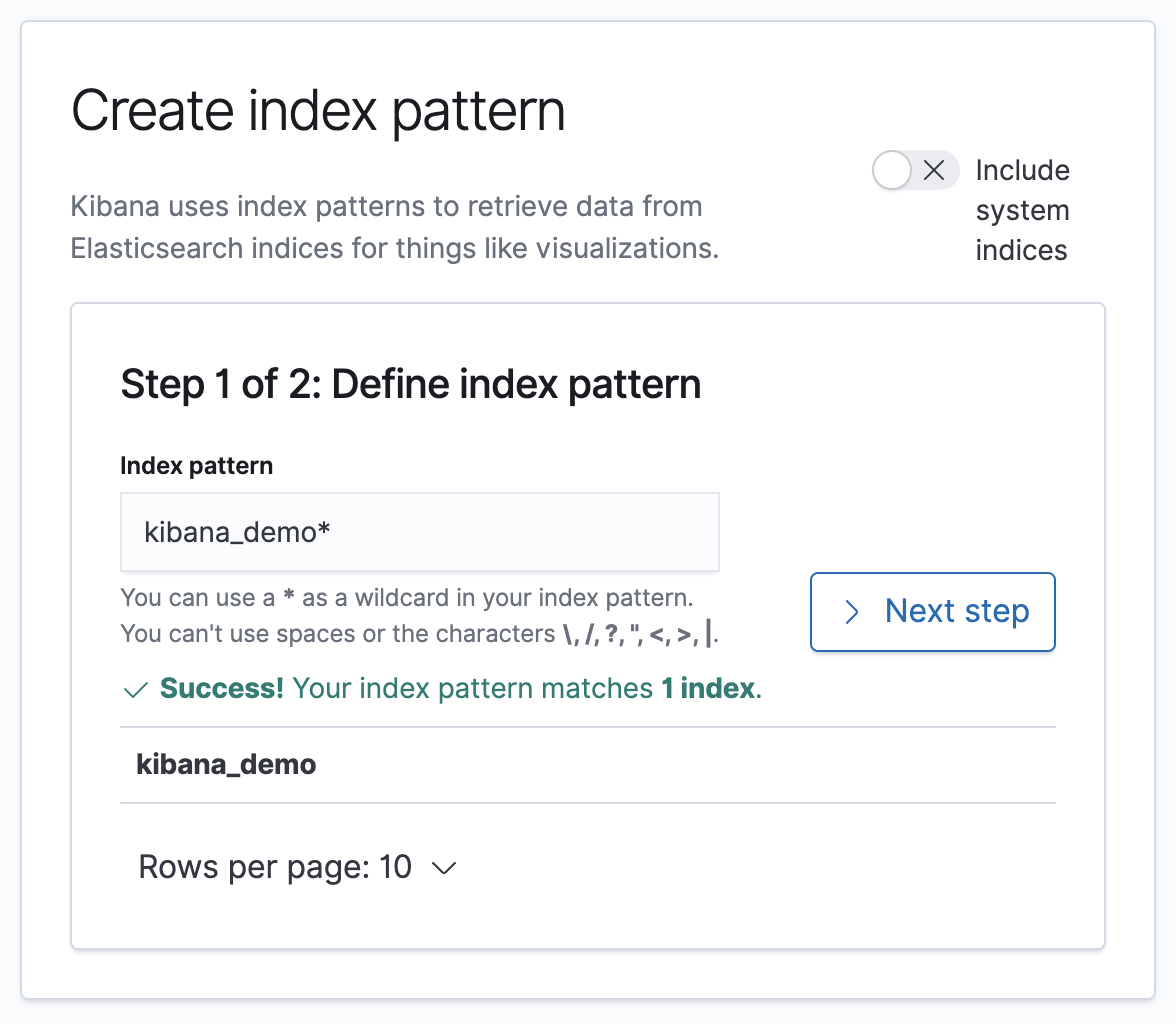
Step 1: Create new index pattern
- From the Home page click on the link Connect to your Elasticsearch index
- Click the Create index pattern button
Step 2: Select your index
- Start typing the name of your index used in your Authentication Connection in the Index pattern field, and Kibana will look for the names of Elasticsearch indices that match what you're typing.
- Click Next Step to configure and specify any time fields or select the option
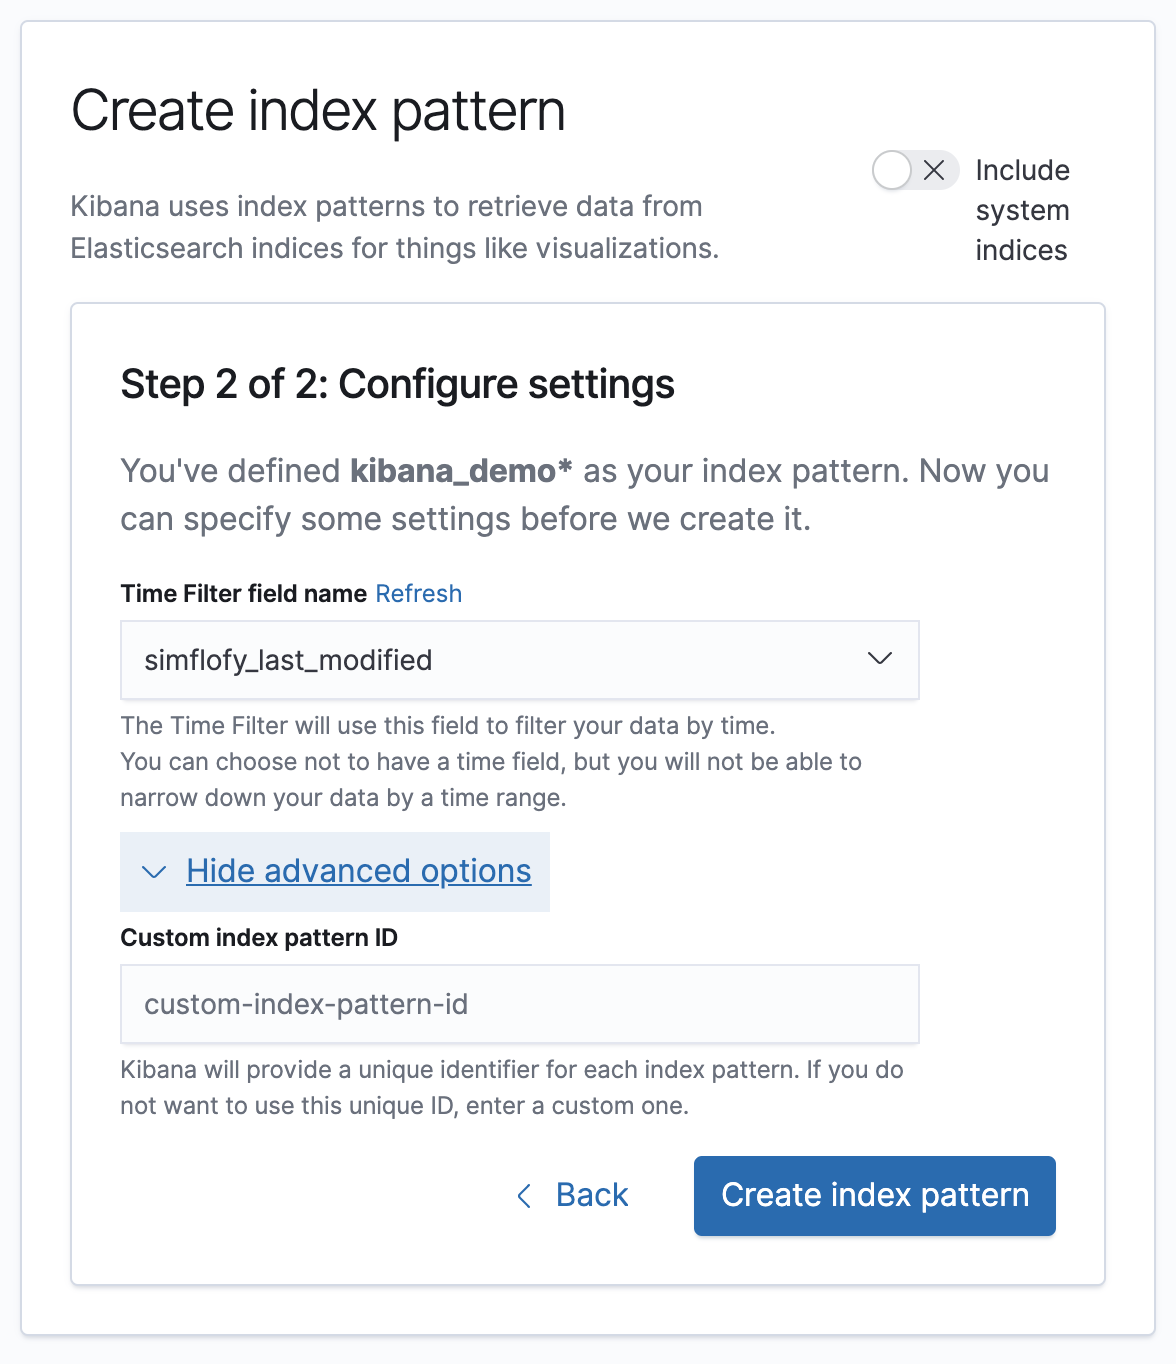
Step 3: Specify your time filter
The Time Filter will use this field to filter your data by time. You can choose not to have a time field, but you will not be able to narrow down your data by a time range.
- Time Filter field name: Select your time field from the drop or choose the option I don't want to use the Time Filter
Advanced Options
- Custom index pattern ID: Kibana will provide a unique identifier for each index pattern. If you do not want to use this unique ID, enter a custom one.
Click the Create inbox pattern button
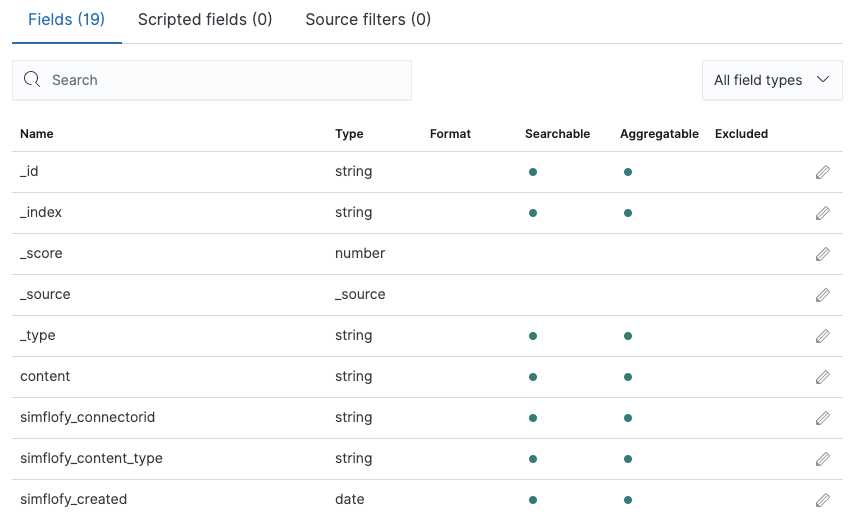
Once the index has been created you will be directed to the discovery results page.
This page lists every field in the index and the field's associated core type as recorded by Elasticsearch. To change a field type, use the Elasticsearch Mapping API
Next: Kibana Discovery