Simflofy Admin Overview
Logging
Simflofy logging allows a user to access and set the log levels of all Simflofy classes.
caution
Important information about updating your log4j libraries in response to vulnerability CVE-2021-44228
Stay safe by following this guide on how to update jars to the fixed version
More information on using Simflofy logging.
Admin Properties
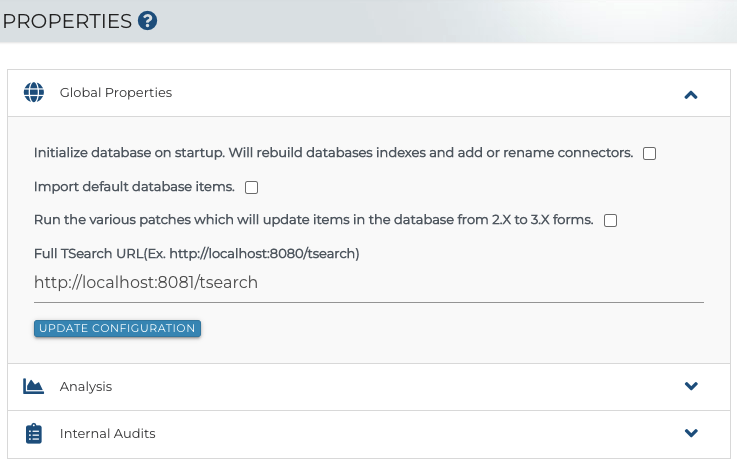
The Admin Properties section of Simflofy Admin allows a user to Configure the following Global, Analysis, and Internal Audits Properties. Once changes have been made to any of the properties use the Update Configuration button to save the changes to the properties file.
Global Properties
- Initialize Database on startup. This will rebuild the database indexes as well as add or rename the connectors
- Import database items
- Run various patches which will update the items in the database from 2.X to 3.X forms
- Enter the Full TSearch URL where these changes are to take place. Example: https://localhost:8080/tsearch
Check the boxes and or set the intervals for the properties you want to update and use the update configuration button to push the changes to your Simflofy System.
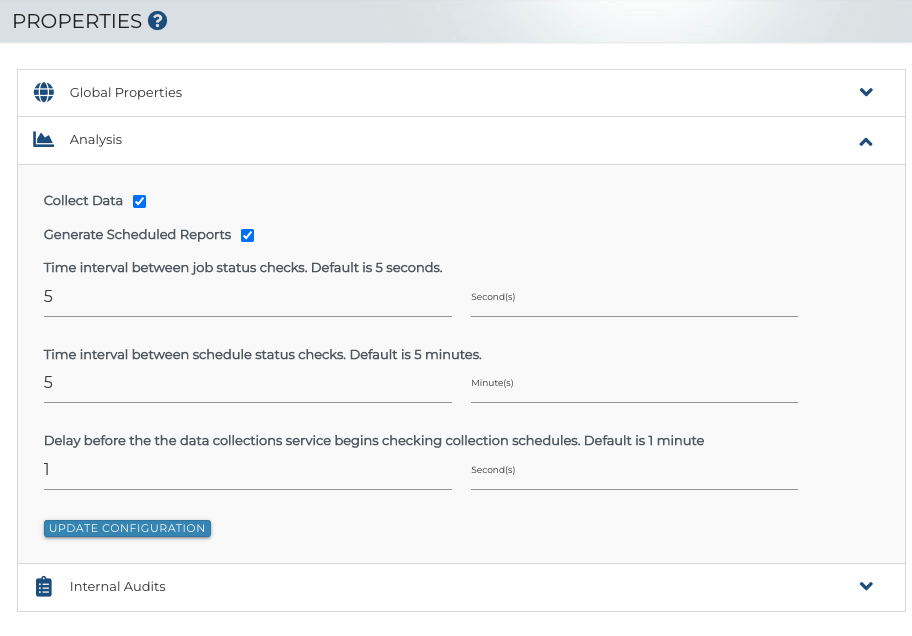
Analysis
The Analysis section of Simflofy Admin allows a user to set the following analysis tools for their Simflofy system.
- Turn on the ability to Collect Data
- Allow users to generate Scheduled Reports
- Set time Interval between job check status
- Set Time between Schedule Status checks
- Set time of delay before the data collections service begins checking collection schedules
Check the boxes for the properties you want to set and use the update configuration button to push the changes to your Simflofy System.
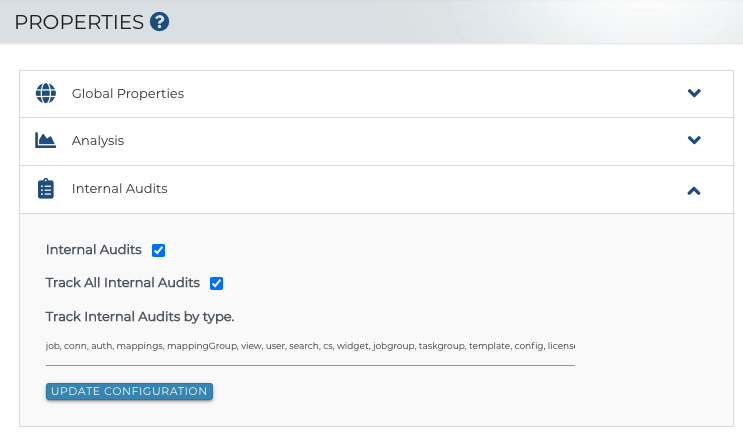
Internal Audits
By default, internal auditing is turned off. To turn auditing on check the box for Internal audits. Here you can choose to Track All Internal Audits by checking the Track all Audits box, or you can Track Internal Audits by Type by checking the box next to each action type you would like to audit.
List of available Audit types:
mappings, repo, job, job group, license, output, auth, view, user, search, cs, widget, template, config, license
More Information on Using and Navigating the Internal Audit Table
Configuration Tools
Simflofy's configuration tool allows for easy import/export of all configurations in Simflofy. This is great for backups or for bootstrapping Simflofy with common configurations.
Export Configurations
Through the User Interface on the left-hand menu under the ADMIN section select Configuration Tools.
Click on the Export button.
Select all the configuration you wish to export from the list.
Hit Export Configuration. This will trigger the download of a JSON file that contains all the selected configuration.
Import Configuration
Access the Configuration Tools menu from the Admin panel on the left-hand menu. Click on the Import button.
Click Choose File and select the exported JSON file from
Click Import.
More information on using the Admin Configuration Tools
API Explorer
This is a reference page for all of Simflofy's REST API calls
Licenses
The Licenses page allows for management of your License Keys. You can add a new License key, or reactivate previously entered keys. The details of each key are listed, including the associated MAC Address, Documents Allowed, Documents Used, End Date and which key is in use.
.png)
Add a Licence Key
To add a license key simply paste the key into the text box labeled License Key and click Add License Key. You can only have one active license at a time.
Reactivate a License Key
To reactivate a license key or adding a new license key copy the key and put it into the License Key text box, then click Add License Key. If the key already exists then it will be activated and the old key will be set to inactive.
Users
Users can be created within Simflofy for user authentication and authorization. From the User page in the Admin section you can conduct the following actions.
- View users that have access to simflofy. Their first and last name. Email address login username and their role.
- Create, edit, delete or disable users.
- View users by organization.
- Manage active sessions to see who is currently logged in. From here you can end all sessions as well. For example if you need to make updates to the system.
- And you can use the search field to narrow down the list of users displayed by name, email, login, or role
Creating New Users
To create new users click on the Create New User button. On the Edit User page fill in the following details for the user you are creating:
- First and Last Name
- Email address
- Login username
- Chose a Simflofy role
- Chose a Federation Role
- Chose a Records Management Role
- Check the Security Officer box if you want to allow the user to create security marks and groups
- Add a password. This can be changed by the user at any time by accessing their profile information
User Groups
User groups are collections of users. They can be used as part of View Level Permissions or Document Level Security.
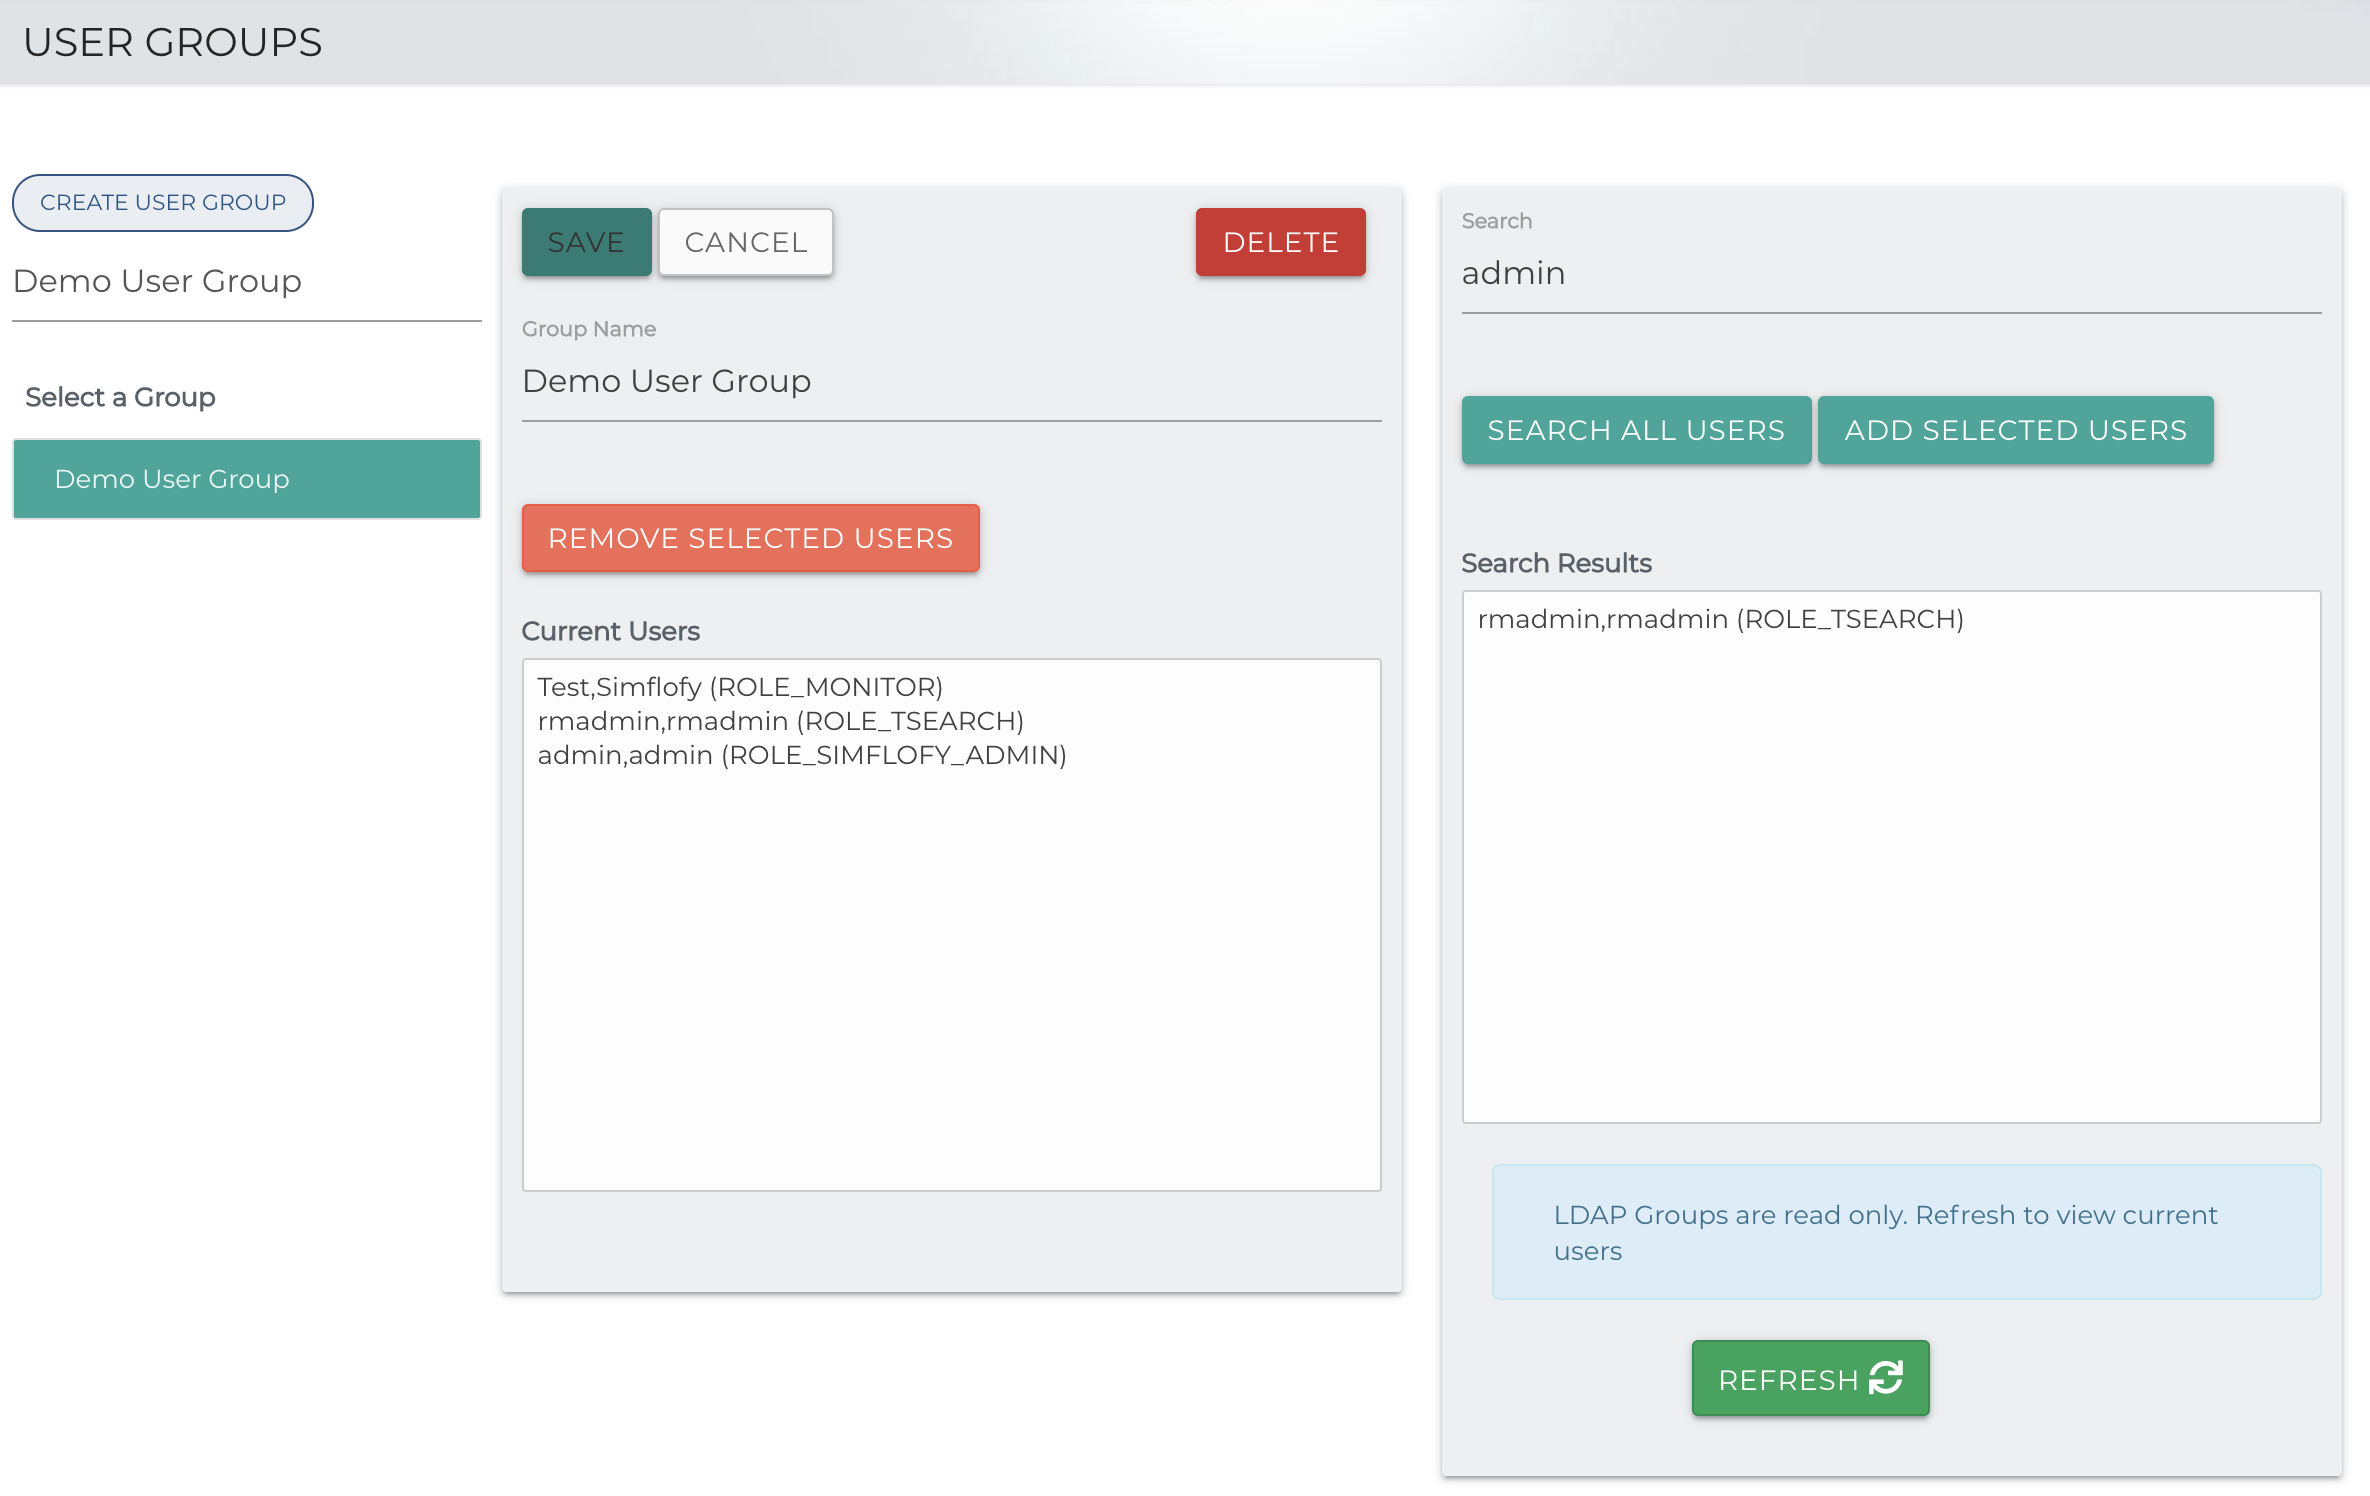
- While adding users you will be able to see their first name, last name, login and role.
- Simflofy Admins will be able to see all users
- Org admins will only be able to see users from their org.
- Includes the ability to search all users
Themes
Theming gives an admin the ability to customize the Logo and Top bar color as well as customize Lead Text sections throughout the application. Each organization may have a separate theme that can be set up by that organizations' admin. This is done in two parts. First, the Logo and Top bar color,through the themes' page under the applications' admin section. Second, the Lead Text Sections, through the editing of a messages.properties file.
Theme Fields
After selections, click Save. After page reloads, the changes will have taken effect. | .png) |
Lead Text Sections
The message.properties file is located under simflofy-admin/src/main/webapp /WEB-INF/messages/. At the bottom of the document there is a section labeled
UI Text. Each following line is labeled with the application section it goes with.
Active Jobs
The Active Jobs page shows the jobs that are currently running. Sometimes jobs can get stuck in the RUNNING state.
Fixing Stuck Jobs
If a job is running and the Abort does not stop the job in an appropriate amount of time, the job can be killed manually through an Admin page.
Under Active Jobs, look for your Job ID and click on the Kill Job button. It will look like a small trashcan.
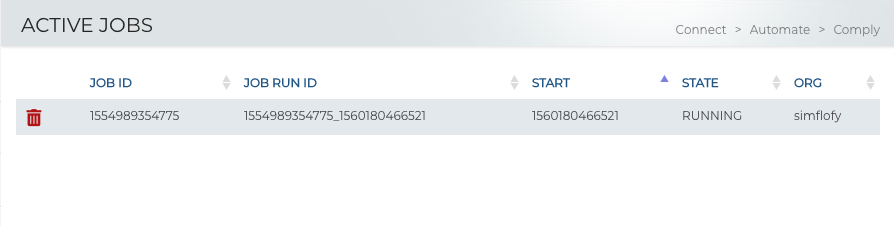
Once the job is killed, you will need to fully restart the job to run it again. Running errors may only produce undesired results.
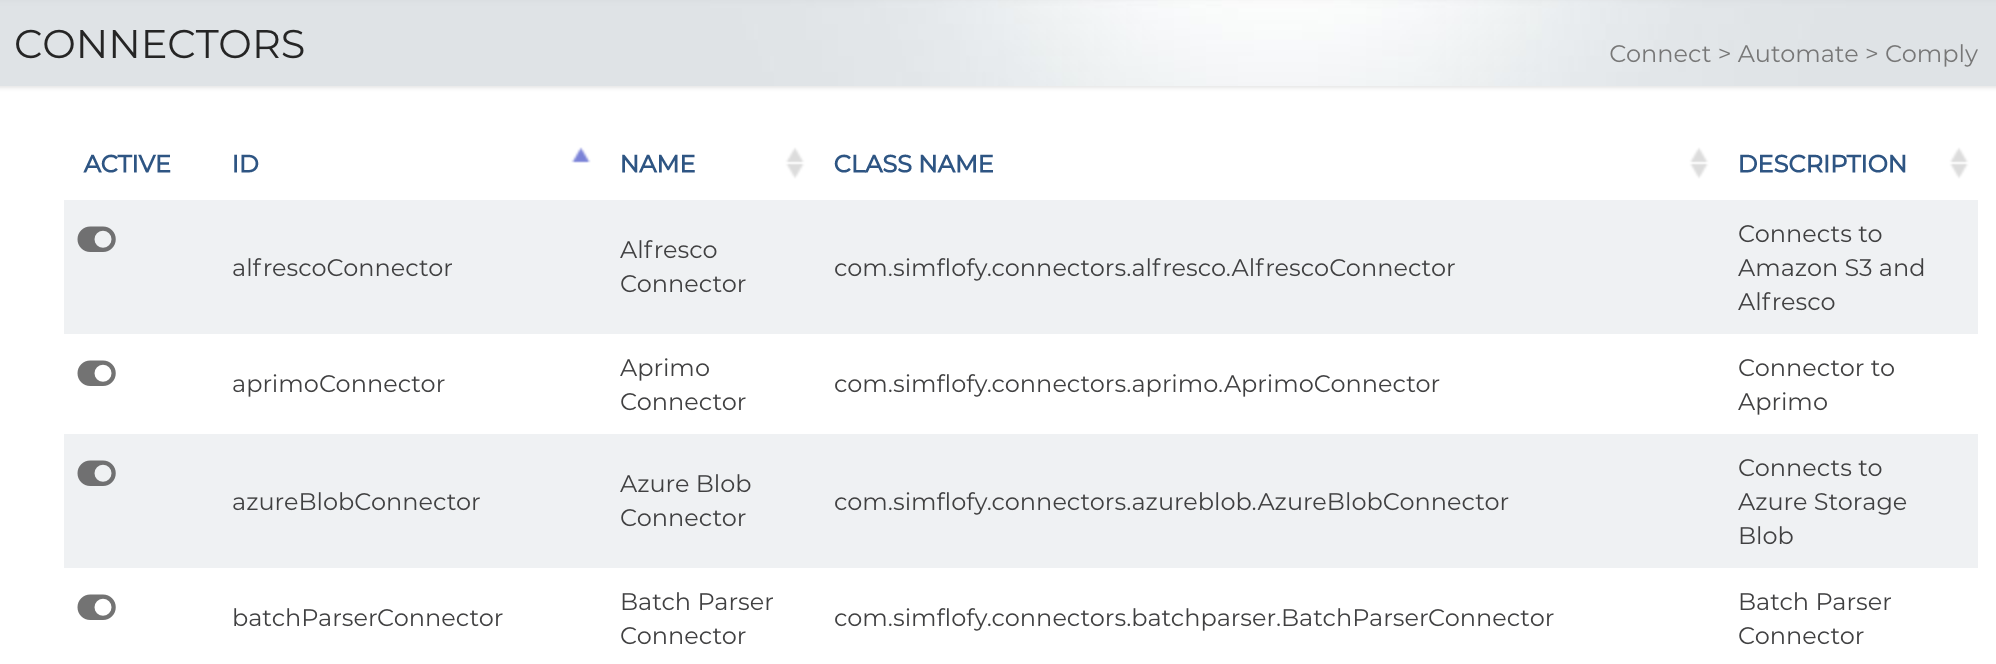
Connectors
The Connectors page shows the available Connector types with the option to Activate or Deactivate any given connector. Custom Connectors will be listed here as well.
Organizations
The Organization page shows the different Organizations used within the Simflofy platform for multi-tenancy. It will display the Organization name, short name, the status (Active/Inactive) which notes whether an organization is enabled, and also provide a link to search their users. Details on how to create an organization
More Configurations
Upgrading Simflofy
A walk through on the steps to take to upgrade your simflofy installation from version 2.7 to version 3.0
Supported Stack
Simflofy Software and Hardware Configuration Requirements
Updating Copyright
A walk through on updating Copyrights and how to find the "Fix Copyrights" button.
LDAP Configuration
Simflofy supports authentication via a third party directory server. This page
provides steps on setting up the LDAP authentication needed.
White Label
White Labeling goes an extra step beyond Theming to give the administrator the
ability to customize global colors and fonts and images for the entire
application
Tomcat SSL An outline of the steps you need to take to generate or install a certificate and enable the necessary ports for the Tomcat SSL protocol