REST MIP Job Tutorial
This tutorial will guide you through setting up a Manage in Place Job between SharePoint Online and Alfresco. This tutorial can be used for other repository connection types than SharePoint. Just do steps 1 - 5 with the repository of your choice instead of SharePoint REST.
Simflofy Setup
Open up and login to Simflofy Admin.
First were going to create our SPO connections.
Click Authentication under Connections in the left-hand menu.
Then click Create New Auth Connection at the bottom.
For the Type, choose either
SharePoint REST Azure AD OAuthorSharePoint REST Auth Connector.For info on setting these up, view these pages: Basic / Azure AD OAuth
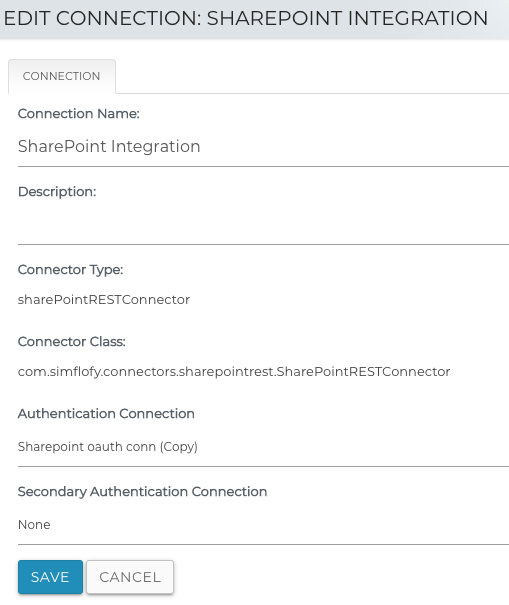
Click Integration on the left under Connections.
Click Create New Integration Connection at the bottom.
For the type, choose
SharePoint REST Connector.Give it a Name and Description, then click Save.
For the primary authentication connection, choose the one you created previously.
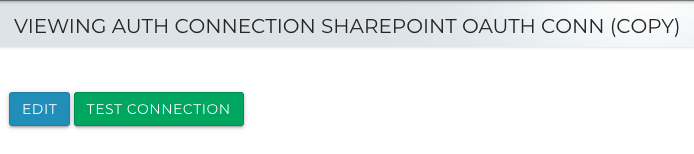
In Simflofy Admin, click Authentication under Connections in the left-hand menu.
Click the eyeball icon next to the Sharepoint Authentication connection you have created.
Then, click Test Connection and ensure that Simflofy can connect to Sharepoint.
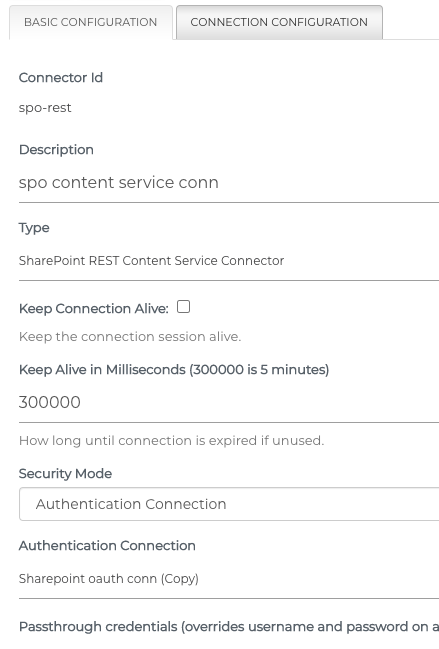
Next, click Content Service under Connections in the left-hand menu.
Click Create New Content Service Connection at the bottom.
Give it a Connector ID and Description.
Take note of the Connector ID you give it for later.
Set the Security Mode to
AuthenticationandThen set the SharePoint REST Authentication connection you created previously.
Optional: To cache some information between future MIP calls, and reduce calls to SPO, check Keep Connection Alive.
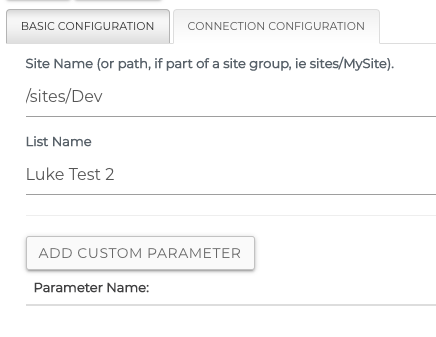
Click Connection Configuration at the top of this page.
Ensure a Site Name and List Name here are given for where you wish to manage content.
- For example, my content is in a list named Luke Test 2 in the Dev site, which is under /sites/Dev.
If using the default Shared Documents list, it should be input as just Documents.
Optional: Add extra custom parameters. These can be found here.
Save this connection.
Next well create Alfresco connections.
Go back to Authentication under Connections.
Click Create New Authentication Connection and choose Alfresco Webscript Auth Connector as the type.
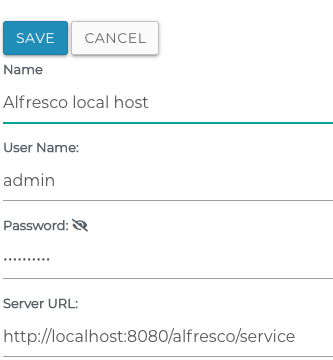
The config here is a Username and Password for an Alfresco user with appropriate permissions to manage content.
The Server URL is the url for your Alfresco service location.
For reference, my config for my Alfresco looks like the following image:
Go back to Connections under Integration on the left-hand side.
Click Create New Integration Connection and choose Alfresco Connector as the type.
Click Save, then set the primary authentication connection to be the Alfresco Webscript auth connection you just created.
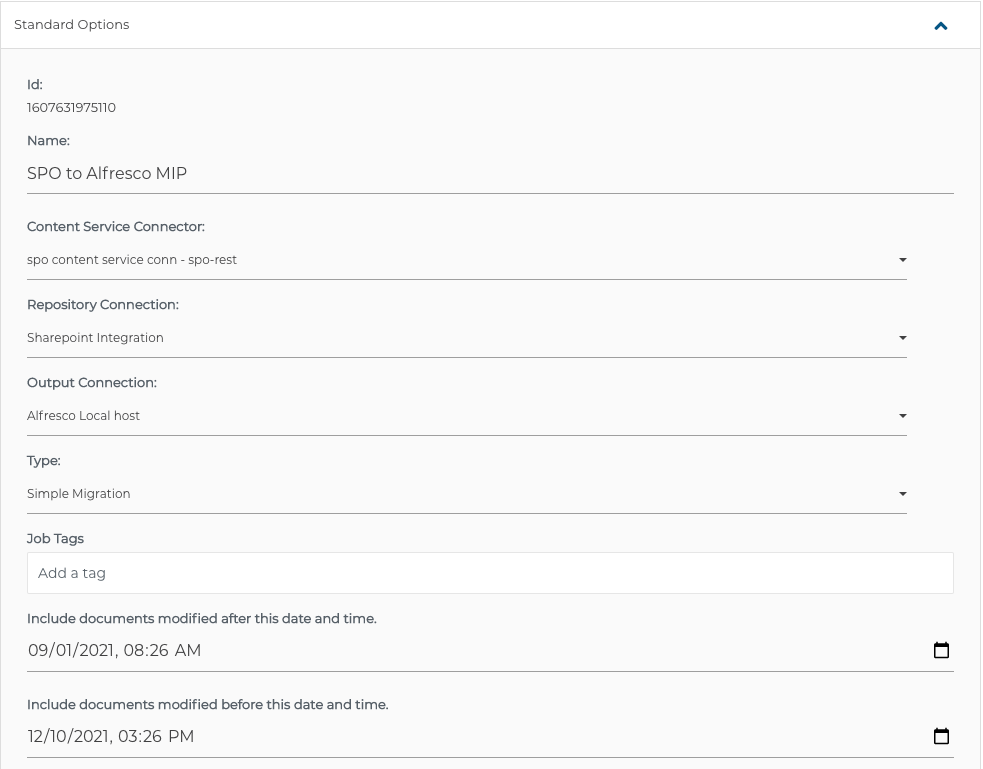
Next, under Integration on the left-hand side, click List Jobs. Click Create New Job at the bottom. Select your SP REST connection for the repository, and your Alfresco connection as the Output. Save to edit the job. Please ensure that:
The content service connection you created is selected as Content Service Connector.
Your repository connector is your Sharepoint Integration connection.
Your output connector is your Alfresco Integration connection.
The job times are broad enough to pick up the files in your Sharepoint. The job will pick up any files modified between the times listed.
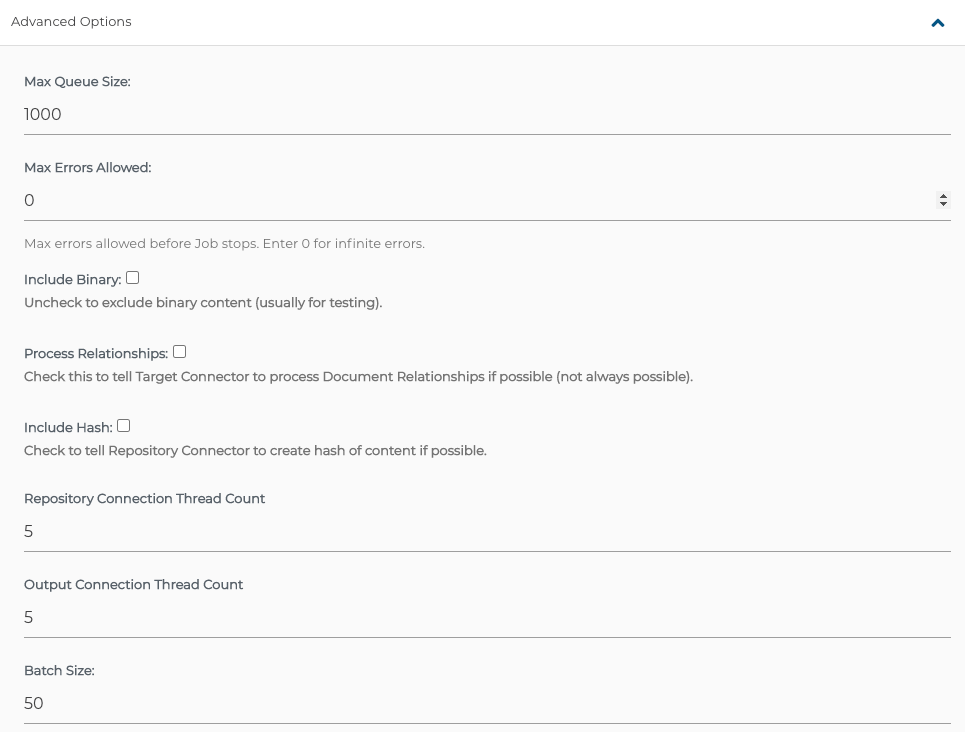
Scroll down, click the Advanced Options dropdown. Ensure that:
Include Binary is unchecked
Batch size is greater than 0.
Scroll back up to the top, click the Mappings tab.
Please ensure your mapping looks like the image below.
If you are using a mapping group, they'll need to be edited first under Job Mappings on the left-hand side under Integration.
Please ensure you click Save for the job at the top if you need to leave the job page to edit your mappings.

Take note here of each column. String is the default for the Source and Target Type fields, but make sure you're setting Source, Mapping Type and Target Type as in the image.
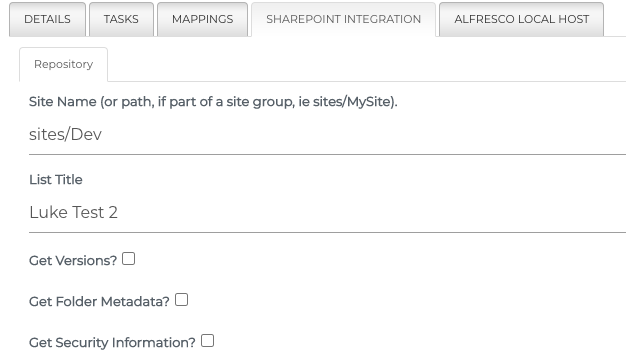
Next, scroll up to the top and click the tab with the same name as your repository connection. In my case, Sharepoint Integration. Ensure that:
The Site Name has the site you wish to pull documents from.
The List Name of the list you wish to pull documents from.
Next, go to the tab for your Alfresco Connection that was selected as your Output Connector.
Your Alfresco Path is the path you'd like integrated content to go to as the root.
Ensure that Create Content URL Always is checked.
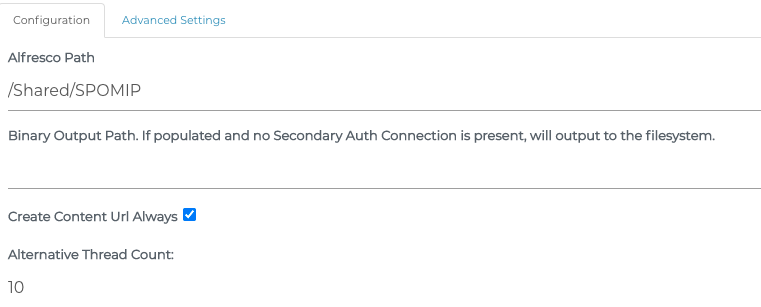
Click the Advanced Settings tab under the tab for your Alfresco Connection
If Is Debug is checked, ensure a Debug Path is ALSO set. This is where the output of debug information will go.
Save your job
TCS/Alfresco Setup
- Ensure the latest patched TCS Jars are installed. These can be obtained from the Launch site.
tip
For more info on installing these two jars (Platform and Share), see the Alfresco TCS Installation instructions.
The default Alfresco install path for the module drop locations are:
/opt/alfresco/app/alfresco/modules/share
/opt/alfresco/app/alfresco/modules/platform
This may be different for a Docker installation. Put the platform jar (transparent-content-services-platform-x.x.x.x.jar) in the platform modules folder and the share jar (transparent-content-services-share-x.x.x.x.jar) in the share modules folder of wherever it is for your Alfresco installation.
Ensure there are no extra TCS Platform or Share jars anywhere other than the ones you just downloaded.
If upgrading TCS Jars, sometimes Tomcat will cache class data and cause issues. To clear this: In your Tomcat folder, go to libexec -> work -> Catalina. Clear out the webapps folder from this location.
Wherever you installed your Platform/Share jars, ensure only one of each exists.
Open up the
alfresco global propertiesfile being used by your Alfresco System. Below are properties that need to be set. Note: If you are using Alfresco branded TCS jars, the base of each property is afs. If using Simflofy branded TCS jars, the base of each property is simflofy. For example, Alfresco Branded vs Simflofy: afs.url= / simflofy.url=- tcs.url= Full URL to your simflofy-admin, ex:
afs.url=http://localhost:8081/simflofy-admin - tcs.user= The username you used to log in to simflofy-admin
- tcs.password= The password you used to log in to simflofy-admin
- tcs.connectorIds= A comma delimited list of the content service connection IDs you want to do MIP with. The names in this list come from the connector-id of your content service connection. This is where you should input the content service connection ID you took note of earlier Ex:
afs.tcs.connectorIds=spo-rest - tcs.licensekey= A valid Simflofy license key
- batchapi.behaviours.disableall: If this is false, reattempts to import data can cause an infinite loop.
- batchapi.rules.disableall: If this is false, reattempts to import data can cause an infinite loop.
- batchapi.jsonthreadcount: The amount of threads to delegate to the json batch integration queue. Default: 20
- batchapi.batchthreadcount: The amount of threads to delegate to the batch integration queue. Default: 50
- batchapi.userid: The Alfresco User to perform the Batch API actions as. Must be a valid Alfresco user. Default: admin
- batchapi.licensekey: This property is Required and does NOT have a default. The license key of the Simflofy instance you are connecting to. This does not have a default. Jobs will not write batches to Alfresco if this value is not set with a valid license key.
- tcs.url= Full URL to your simflofy-admin, ex:
Now were going to add some additional logging for TCS for troubleshooting purposes. Well do this by creating a custom log4j.properties file in Alfresco.
- In a normal install, the location for this will be
{TOMCAT}/shared/classes/alfresco/extensions. This may differ in a docker installation. - Create a new file and name it custom-log4j.properties, then edit it
- For maximum logging, please set. These can be set to different levels if less logging is needed:
log4j.logger.com.fikatechnologies=tracelog4j.logger.com.simflofy=trace
- In a normal install, the location for this will be
Restart your Alfresco or Tomcat if it is running in Tomcat to have the configuration changes and jar changes get picked up.
Go to your Alfresco TCS admin page. This is at
{ALFRESCO_SERVER}/alfresco/s/enterprise/admin/tcs-admin.- The name of the content service connector you created should appear on this page. Keep in mind this is different from the content service connector ID, which is what you set in afs.tcs.connectorIds.
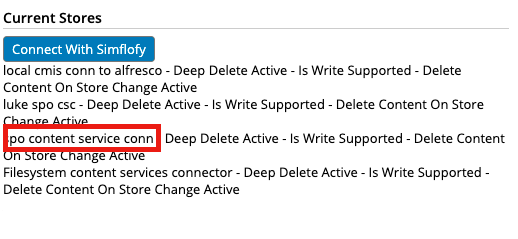
- Note spo content service conn is the name of my content service connection
with the ID spo-rest. spo-rest is what I put in
afs.tcs.connectorIds - Also, note that it says Deep Delete Active and Is Write Supported. These are the defaults, and are what is needed for content to be modifiable and deletable in Sharepoint from Alfresco.
- The name of the content service connector you created should appear on this page. Keep in mind this is different from the content service connector ID, which is what you set in afs.tcs.connectorIds.
If all of this looks correct, then you can go back to simflofy-admin and run the job you configured earlier by going to Integration on the left-hand side and clicking Run and Monitor Jobs. Then click the Play button next to the name of your job.
 This is a completed job. It read 7 files from my Sharepoint library and wrote (set as MIP) 7 files to Alfresco. If there are errors, then the number in Errors will show you how many and the cell will be shaded red. If the entire job fails, the Status will be Failed and red instead of completed. You can click the number under Errors to view a list of failed documents and their errors. If the error mentions nodes and needs to check your Alfresco log, the error is at Alfresco/TCSs end and the alfresco.log will need to be pulled.
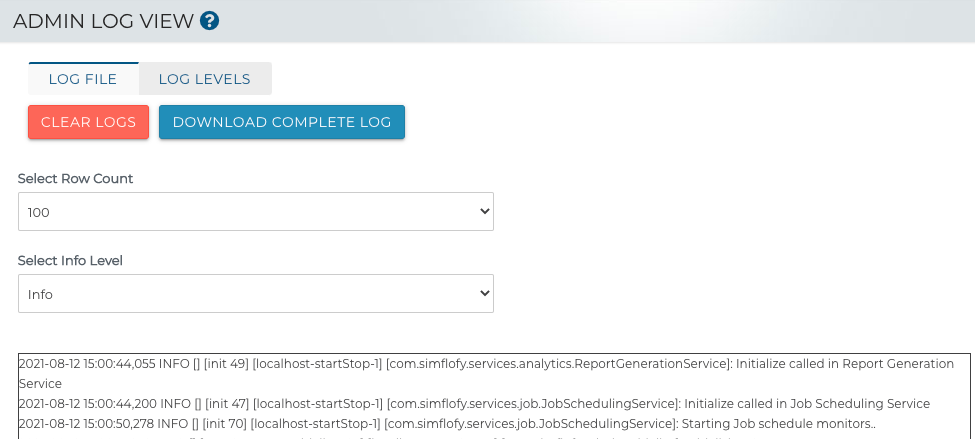
Otherwise, simflofy-admin logs can be pulled. They can be downloaded by going to Logging under Admin on the left, then clicking Download Complete Log
Related Articles:
Alfresco Connector Setup
Simflofy Integration Tutorials