Box Cloud
Box, Inc.The company focuses on cloud content management and file sharing service for businesses. Official clients and apps are available for Windows, macOS, and several mobile platforms.
Before you can set up your Box Cloud Connection you must first create the necessary Authorizations via the Box App. Follow this link for steps on Box App Creation and Authorization. Once created return to this page to begin setting up your connections in Simflofy.
Box Authentication
Creating a Box App
Authentication Choice
We recommend using the Java Web Token (JWT) Authentication Connection, as it offers the best performance options
JWT Application Creation
If using Java 8, JWT Authentication requires the installation of the Java Cryptography Extension.
Ensure your account has 2-step verification enabled.
Navigate to the Developers Console (link)
Choose Create New App
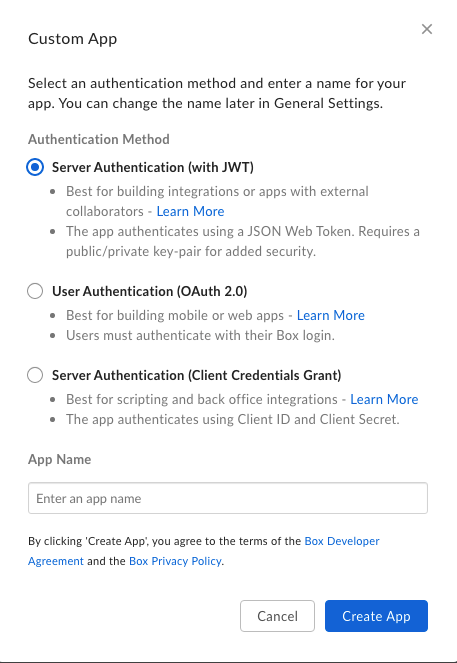
Select Custom App
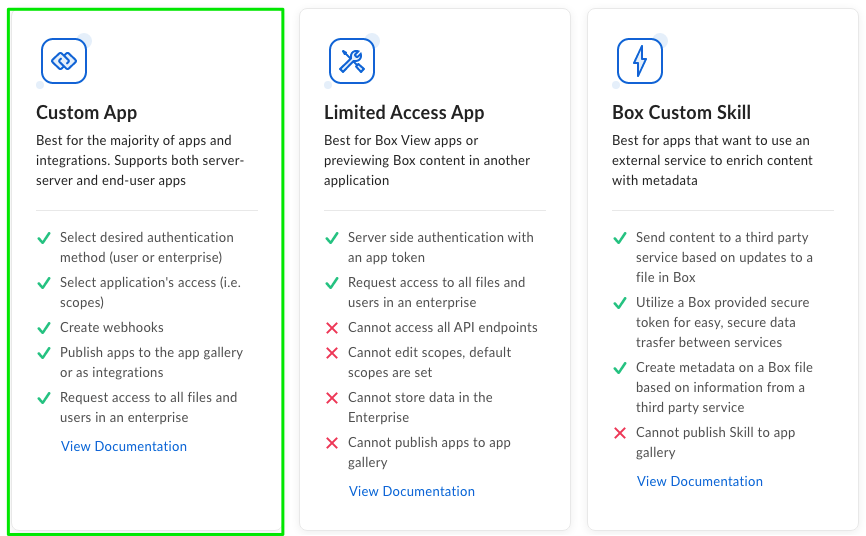
- Select Server Authentication (with JWT).
note
Box removed the ability to change this selection early in 2021, so this choice is permanent.
tip
In your applications you should see Service Account Info. The Service Account ID is the service user's email address and must be a collaborator on any folder you wish to migration
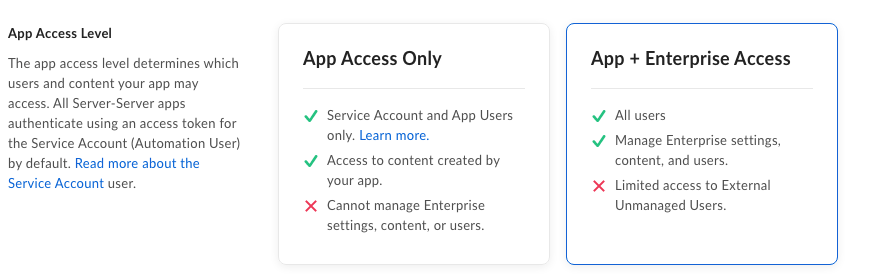
- Under the Configuration tab in App Access Level, select the enterprise setting
- In Application Scopes make sure both Content Actions are checked
- In Advanced Features, check both options

Click on Generate a Public/Private Keypair
Open the file provided. It should take the following form
{
    "boxAppSettings": {
        "clientID": "",
        "clientSecret": "",
        "appAuth": {
            "publicKeyID": "",
            "privateKey": "",
            "passphrase": ""
        }
    },
    "enterpriseID": ""
}
Take the entire value of the private key and save it to a separate file. This will be your private key file.
The information in this config file can be used to fill in the fields of aBox Integration Connection.
Alternatively, you can use the file to create a JWT Authentication Connector.
- To authorize your app follow Box's instructions. Pay particular attention to the App Approval section.
Logging in as the Service User
Navigate to your account's admin console ( yourapp.app.box.com/master )
Click Content
Select User(s) to view their content
If you right-click, you can select "Log in to users account"
This gives you the standard Box application view, allowing you to gather Folder Ids, etc. while in the view of the user.
OAuth Application Creation
SSL Required
This requires tomcat to be running using the 'https' protocol. Box will not accept 'http://' addresses. Tomcat will need to be configured to use SSL/TLS.
Creating a Box OAuth Application requires you to choose the Standard OAuth 2.0 Authentication Method in the Create a New App screen.
- In The Configuration tab of your app, retrieve the clientId and clientSecret.
- In App Access Level, select the enterprise setting
- In Application Scopes make sure both Content Actions are checked
- In Advanced Features, check both options
https://[simflofyUrl]/simflofy-admin/authconn/oauthcb
Creating Authentication Connections
Each app type has its own Authentication Connection
Box JWT Authentication Connection
- Connection
- Proxy Information
- Logging
- Example
- Preview
Name: Name of this connection.
JWT JSON Key File:If you have downloaded the JWT key file from the Box Admin Console, and it is on the same file system as Simflofy, then you can refer to it here (i.e. C:/Users/Simflofy/mykeyfile.json).
JWT JSON: Alternatively you can copy the contents of the JWT key file and paste it in this text area.
App Users Count: While in Output mode, the Simflofy Box Connector allows you to create Box App Users to do bulk uploads to Box. This is an advanced setting and is only recommended for large integrations since there is a startup cost in creating the app users in Box. Set to 0 to not use app users.
Base name of the app users: Base name that will be used for each app user.
The ID of the managed user you wish to act as: The connection will act as the user id for all actions.
Box Connection Timeout: Connection timeout interval.
Box Read Timeout: Read timeout interval.
If using a proxy, fill this out as instructed in the Proxy Tab
- Proxy URL: The URL of the proxy server
- Proxy Port: The port of the proxy server
- Proxy Username: The username to authenticate to the proxy server
- Proxy Password: The password to authenticate to the proxy server
- Enable SDK Logging: Check to enable
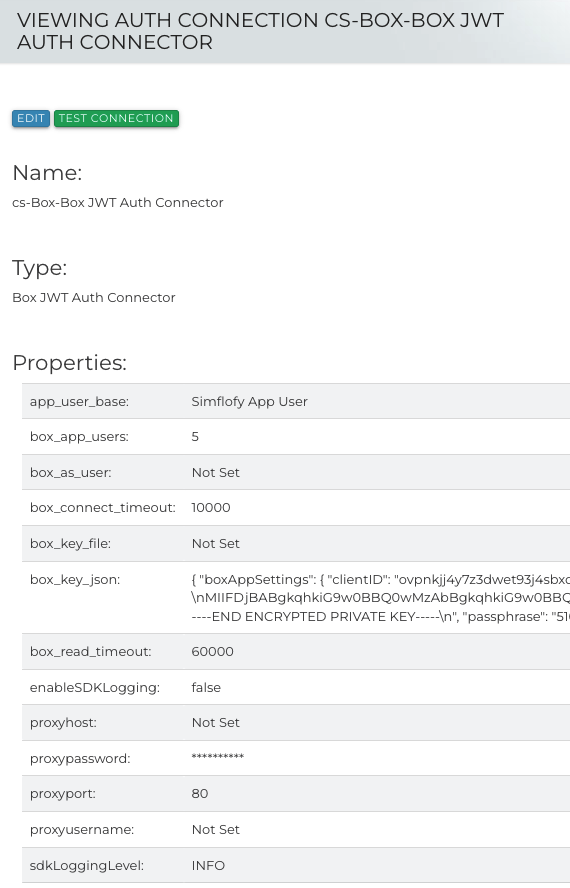
Box JWT Authentication Connection Configuration Example
- Name: cs-Box JWT Auth Connector
- Type: Box JWT Auth Connector
- app_user_base: Simflofy App User
- box_app_users: 5
- box_as_user: Not Set
- box_connect_timeout: 10000
- box_key_file: Not Set
- box_key_json: { "boxAppSettings": { "clientID": "ovpnkjj4......}
- box_read_timeout: 60000
- enableSDKLogging: false
- proxyhost: Not Set
- proxypassword: ***
- proxyport: 80
- proxyusername: Not Set
- sdkLoggingLevel: INFO
Box OAuth Authentication Connection
- Connection
- Proxy Information
- Logging
- Name: Unique name for this auth connector.
- Box Developer Token: (Optional) Developer Token to be used instead of clientId and secret. Developer tokens expire 60 minutes after creation
- Box Client ID: Client ID box will give you once you've set up the Application in Box.
- Box Secret Key: Secret Key Box will generate for you as part of the Application Setup in Box.
Authentication
After filling in your client id and secret. Hit the "Authenticate" button. You will be redirected to a screen in Box asking you to confirm the application permissions. You should be returned to Simflofy after accepting. If you receive an error, your redirect uri in the Box Application config may not be correct.
- Proxy URL: The URL of the proxy server
- Proxy Port: The port of the proxy server
- Proxy Username: The username to authenticate to the proxy server
- Proxy Password: The password to authenticate to the proxy server
- Enable SDK Logging: Check to enable
Discovery Connector
The Box Discovery Connector requires a working authentication connection. It will gather all metadata templates and their associated fields. However, there is one type of metadata, known as "Custom Metadata" that is applied to individual documents, but not part of a global template.
In order to find Custom Metadata, you will need to supply the id of a folder to crawl for documents. The id of a folder is visible in its URL.
Simflofy will attempt to extract the custom metadata elements of any folder or file it finds, adding it to the schema.
The values will have a type of "properties" for the purposes of mappings.
Box Job Configuration
Job Configuration (Repository)
Common Issue:PKIX path building failed
This is a common issue when attempting to download files from box. The full error will look like this in the logs
Caught exception: Couldn't connect to the Box API due to a network error.
com.box.sdk.BoxAPIException: Couldn't connect to the Box API due to a network error.

...(About fifteen lines of stacktrace)...

Caused by: javax.net.ssl.SSLHandshakeException: PKIX path building failed:
sun.security.provider.certpath.SunCertPathBuilderException: unable to find valid certification path to requested target
In order to fix this, first, attempt to install Box's ssl certificate in your java keystore.
If that does not work, you can also download the Java Cryptography Extension (JCE) Unlimited Strength from Oracle
and install the files in <JAVA_HOME>/jre/lib/security.
- Box Query
- Repository Crawl
This tab gives you three ways to retrieve data from Box. They construct a query using Box's Search API and can be mixed and matched as needed
Box Query: Used as a query parameter
Folder ID's (comma delimited): A comma delimited list of folder ids to restrict the search
Content Types(comma delimited): Available options are:
- file - Limits the search results to files
- folder - Limits the search results to folders
- web_link - Limits the search results to web links, also known as bookmarks
Retrieve Folders: Folders will be retrieved as repository documents.
Retrieve Files: Checked by default, files will be retrieved.
Retrieve only listed folderIds: The connector will only collect the documents and folders configured in the Box Query tab, and will not crawl.
Retrieve Collaborations: Will retrieve collaborations in the format [user]=[role].
Truncate parent paths to exclude folders above specified folders:
As a default, the parent paths of files are absolute, and will include the root folder All Files as well as any
folders above the configured ones. When this box is checked, only folder paths up to the "crawled" folders will be included.
Box Folder Paths
If we have the file /AFolder/subfolder/testfile.txt at our root in Box, and we migrate subfolder, the file's final parent path will
be /All Files/AFolder/subfolder/. With the truncate option checked, it will be /subfolder/testfile.txt
Job Configuration (Output)
Common Issue: Blocked Uploads
The upload APIs for box are different from most others used by Simflofy. Make sure your firewall is set to allow upload.box.com, or you
will receive the error:
Error while uploading file <filename>.pdf Extended Response is: Couldn't connect to the Box API due to a network error.
- Output Specification
- Collaborations
- Data
Output Folder Path:
The root folder to output too. Your repository folder structure will be
replicated under this directory
Output Folder ID:
Another option for selecting the output folder. Folder Ids can be retrieved from the url when viewing the folder in a browser.
This will take precedence over path if supplied
Include Un-Mapped Properties
All metadata will be output, even if no mappings are supplied. These values will be applied as
global properties to the file.
Date/Date-Time Format
Output format for the date. Box is restrictive on this, so changing either is not recommended.
Add Collaborations:
Add collaborations to files written. Collaborations will need to be added as part of a task in the format of
[email]=role. The Javascript task is useful for this.
Strip Collaborations:
Will remove all collaborations before adding them.
Collaborators Can View Path:
Sets the option to true on a collaboration. The
collaborator can see the parent path of the document.
Notify Collaborators on Add:
Collaborators will receive an email (not recommended).
User ID to add Collaborations (Group Only):
Use a group id instead of an email.
Remove document and previous versions if it fails to fully upload:
Used when outputting versions to Box. If a document is a version series fails to upload, Simflofy
will delete the previously uploaded versions as well. They will be counted in the Removed column
in the job status page
Milliseconds to wait in response eto rate limit errors (multiplies times retries):
Box has a very strict rate limit and will return an error code 429 (Too Many Requests) fairly
often. This tells Simflofy how long to wait before automatically retrying the call that failed.
Number of retries to attempt before failing a document:
The name says it all.
If a file with the name already exists in the parent folder, create a new version:
If unchecked, documents with the same name will fail if
a document already in the target folder has the same name
Move Files Instead of Write (Box to Box only):
Box has special methods for moving files within the same box organization.
If this is checked, Simflofy will use those methods instead of reading and writing content.
To do this you will need a task to manipulate the parent path of the document in order to rehome it.
Copy Files Instead of Write (Box to Box only):
Same as moving, but box will copy the files to their new location, instead of move them.
Pre Cache Folder Structure(experimental):
Simflofy will recursively walk the structure below the target folder and cache their paths and ids.
This can take a long time and is not really of use unless there is already content under the target folder.
Use Large Files Method on Files over 20 MB:
Will use Box's large file apis to more reliably upload large files
warning
This method is currently bugged and will cause an error if called by a Service User account. If you use JWT Authentication, leave this unchecked
Only Create Folders:
Works in tandem with pre caching. Prebuild the folder structure, then use a different job that pre-caches to
reduce overall times needed to move the content (experimental)
Only add template metadata if all listed fields are present:
This field allows you to regulate what fields are allowed to be empty for documents receiving a metadata template
Box Content Service Connector
The methods currently supported for this connector are:
- Create Folder
- Create File
- Update File
- Create File from Item
- Get Object by path
- Update Properties
- Get File Content
- Get Object Properties
- Delete Folder
- Get Root Folder Id
- List Folder Items
- Delete Object by ID
- Get Types
- Get File Item
- Get ACLs
- Set ACLs
- Delete ACL
Managing Permissions with Box Content Services
The API supports GET,POST,and DELETE calls.
All the endpoints take the "id" parameter, which takes the form of a number. Ex.77411856592
A guide to available box roles can be found here:
Read Permissions (ACLs)
Request:
GET /repo/(connectorId)/acls?id=(id)&isFolder=(isFolder)
Description:
Retrieves a list of in the format of ["UserName(UserId):Role",..... ]
You will need to extract the UserId or Name from each item for use in POST/DELETE request.
Path Parameters:
connectorId: The connector ID of your content service connector
Query Parameters:
id: The repository id of the item.
Optional Parameters:
isFolder: Is the item a folder? Default is false.
GET repo/box/acls?id=77411856592&isFolder=true
Returns:
{
  "results": [ "M Lugert(77567866603):EDITOR", "JLipton(77422856603):VIEWER" ],
  "success": true
}
Example With CURL
curl -u admin:admin "localhost:8081/simflofy-admin/api/repo/**box/acls?id=77411856592 &isFolder=true**" | json_pp
Write Permissions (ACLs)
Request:
POST /repo/(connectorid)/acls?id=(id)&acls=(acls)&isFolder=(isFolder)&viewPath=(viewPath)¬ify=(notify)&isGroup=(isGroup)
Description:
Adds acls to the selected document.
It is important to note that Box collaborations are inherited from the parents. The parent of the item must also have the collaboration being added or a 403 response will occur.
Path Parameters:
connectorid: The connector id of your content service connector
Query Parameters:
id: The repository id of the item.
acls: A JSON Object in the format {"User1":"Permission1","User2":"Permission2"}
Optional Parameters: Applied for each pair in acls
isFolder: Is the item a folder? Default is false.
viewPath: Dictates whether the collaborator can view the parent path of the item. Default true.
notify: If true, will send a notification for each collaboration created. Default false.
isGroup: If true, will attempt use the supplied id to add collaboration for a group. Default false
This will not work with an email address as groups don't have them
Example from Postman
POST repo/box/acls?id=77411856592&acls={"testuser@box.com":"EDITOR"}¬ify=true&isFolder=true
Returns:
{
    "results": [
        "M Lugert(77567866603):EDITOR",
        "J Lipton(77422856603):VIEWER",
        "testuser@box.com(77427777603):EDITOR"
    ],
    "success": true
}
Example With CURL
curl -u admin:admin -X POST "localhost:8081/simflofy-admin/api/repo/**box/acls?id=77411856592&acls={"testuser@box.com":"EDITOR"}¬ify=true&isFolder=true**" | json_pp
Delete Permissions (ACLs)
Request:
DELETE /repo/(connectorid)/acls?id=(id)&aclId=(aclId)&isFolder=(isFolder)
Description:
Removes the permissions for the supplied User or Group IDs from and item.
Path Parameters:
connectorid: The connector id of your content service connector
Query Parameters:
id: The repository id of the item.
aclId: A comma delimited list of User or Group Ids to remove from the item
Optional Parameters:
isFolder: Is the item a folder? Default is false.
DELETE repo/box/acls?id=77411856592&isFolder=true&aclId=testuser@box.com,77422856603
Returns:
{
  "success": true
}
The following GET call should produce:
{
    "results": [
        "M Lugert(77567866603):EDITOR"
    ],
    "success": true
}
Example With CURL
curl -u admin:admin "localhost:8081/simflofy-admin/repo/box/acls?id=77411856592&isFolder=true&aclId=testuser@box.com,77422856603" | json_pp
Tutorial: Mapping to Box Content Templates
Metadata Templates in Box
Box uses metadata templates to contain data outside of the global scope.
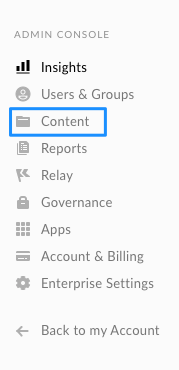
In order to add or view current content templates, first go to the Admin Console
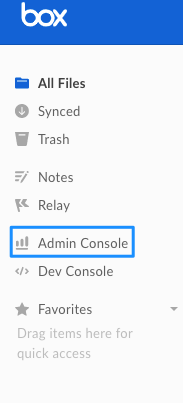
Then click on Content
Once in the Content Manager page, click on Metadata.
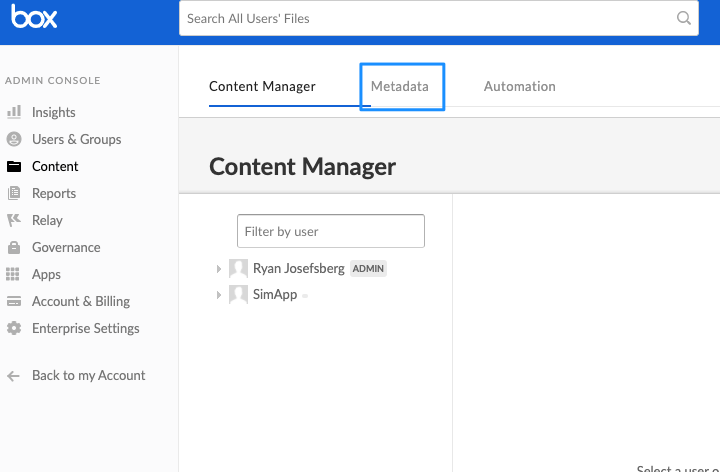
You should now see a page with all available metadata templates. If there are none, then there are current no templates.
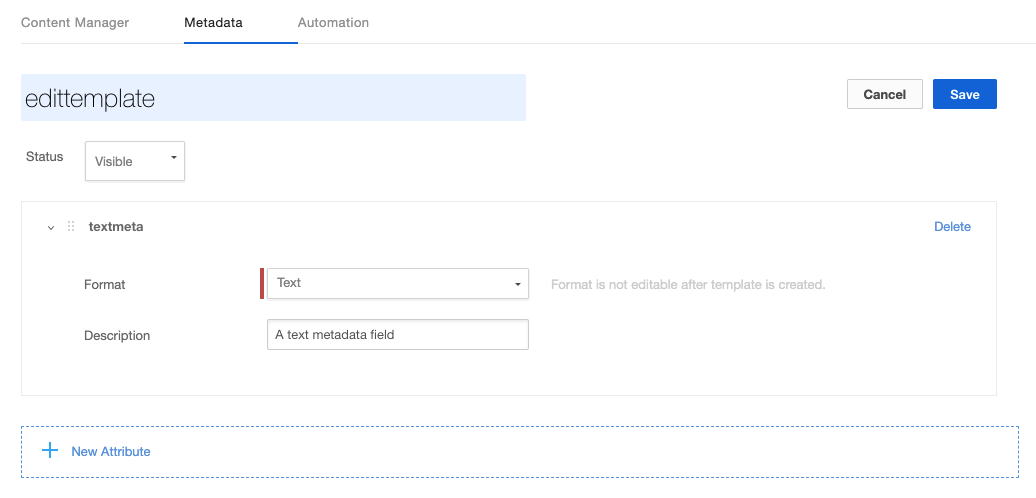
So, lets make one! Click on Create New, and you'll see the following:
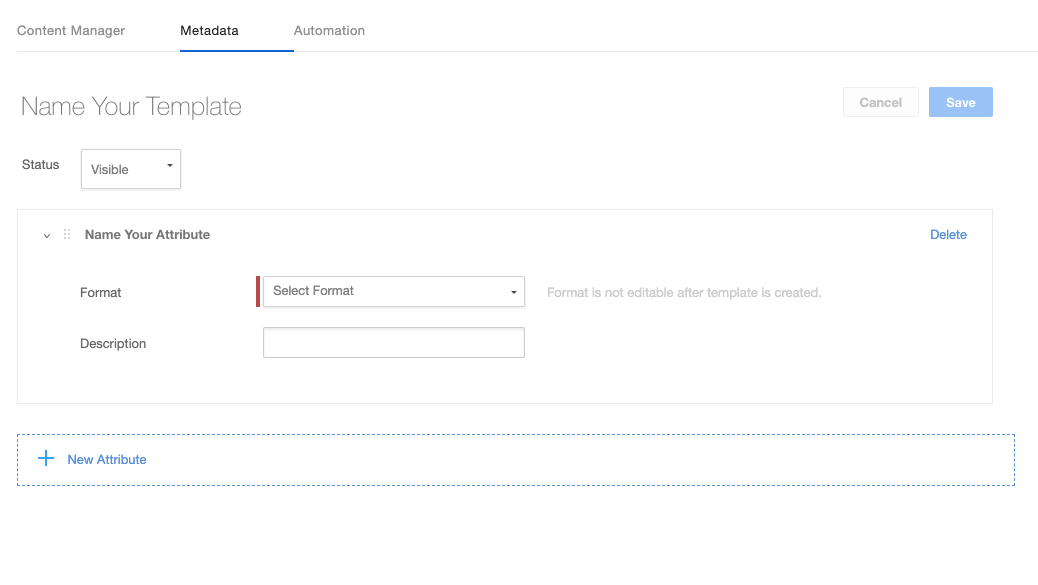
You'll see a number of fields here. First, we need to name the template (Name Your Template is a form field).
Then, we'll need to select a metadata type. This will be important for mappings later. Currently, Simflofy supports the three basic types (Number, Date Text).
Here's an image of the form filled out for a text field.
Creating Mappings in Simflofy
First, create a job that's going to write to Box or create a Job Mapping to be reused later.
For each metadata template you're mapping to, add the following Aspect mapping with the template key as the target.
Template Keys (from Box's Documentation on Metadata Template Keys)
When a metadata template is created, a templateKey is automatically generated from the displayName of the template unless a templateKey is explicitly provided. When creating the template key any spaces and irregular characters in the name are removed, and the string is transformed to camel case. For example, a metadata template that is named Test Name (with-special_) Characters will have a templateKey of testNameWithspecialCharacters. This template key is then used when making any API requests to get the template's information or assign it to an item.
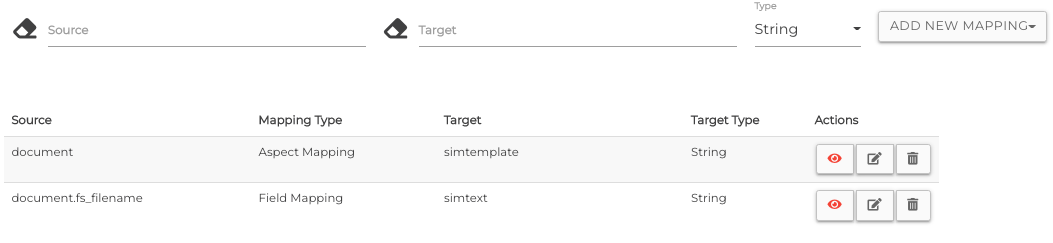
With that done, map your fields as normal to the fields on the template.
Here's an example
Using Calculated Fields With Templates
Box template fields will only be picked up during the mapping process if they have the right prefix. In this case, the prefix will be the Source of the Aspect Mapping you using for the template. So, for the mapping:
document -----Aspect Mapping----> simtemplate
The field mappings for the fields in simtemplate will need the prefix document.
Because of how Calculated Fields work, they are evaluated and added to the document as regular field values. So, if you wish to direct a calculated field to a template field in Box, you will need two mappings. First, a Calculated Field to generate the field value, then a Field Mapping.
For example, if we want to put the constant value Simflofy on the field title in Box, we need the following:
'Simflofy' -----> Calculated Field -----> document.title
document.title -------> Field Mapping -----> title